Zesty.io Instance Module/Template Installer
This outlines the use of Zesty Instance installer which features the export and install of an Instance template or module.
The Zesty.io Instance Installer streamlines the process of creating and managing your Zesty.io instances. This tool allows you to quickly set up new instances, integrate pre-built templates, and manage your Zesty.io environment efficiently. This guide provides a quick overview of the installation process and its key features.
Definition
- Instance module is a reusable collection of data schemas (models) and associated styles. It's designed to be imported into an existing Zesty.io instance, providing a ready-to-use set of content structures and visual presentations. Think of it as a modular building block of functionality and design.
- Instance template is a full website framework that includes a base theme, content structures, and often sample content. It serves as a foundational starting point for creating a new Zesty.io instance, enabling users to rapidly deploy a website with a consistent design and structure.
Note: In order to use the instance installer, user must have an authenticated session, or a developer access token in Zesty.
Exporting a Template
This function is used to create a zip file that contains the resources from your instance including css, js, settings, style variable, models, contents and views.
Steps on how to export an Instance template:
-
Access the templating.api.zesty.io
- Input your session or developer token in the Token field.
- Select the Export Template.
In the Instance ZUID field, input the Instance ZUID of the instance you want to export.
-
Click Export. This will generate a zip file containing the instance resources. Export duration may vary depending on the size of the instance.
Note: The exported zip only includes the published contents and code files.
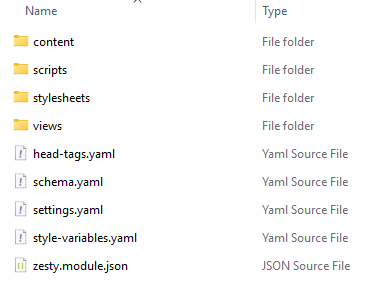
Image 2.1: Instance extracted zip file content
Exporting a Module
This function is used to create a zip file that contains the resources of a specific model from the instance.
Steps on how to export an Instance module:
- Access the templating.api.zesty.io
- Input your session or developer token in the Token field.
- Select Export Module and input the fields needed for exporting.
- Instance ZUID (required) - The target instance zuid.
- Model ZUID (required) - The model zuid that you want to export.
- Include Clippings / Global (default: false) - Select true if you want to include the global/clipping model and its content when exporting the instance resources.
- Views ZUID (optional) - add the views zuid that you want to include on the generated zip file which is not associated with the selected models.
- Click Export. This will generate a zip file.
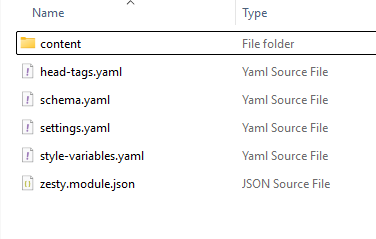
Image 2.1: Model extracted zip file content
The generated zip will include:
- The specified model and the models parented to it.
- The published contents and views bind to the models.
- The css and scripts that are associated with the models. To include css and js on the export, you need to rename the files with the model name on it. For example, about model can include css and js with filename
about.module.cssandabout.module.js - Clippings / Global models if tagged as true.
- The views that are specified on views zuid field.
Installing a Template
This function is used to import the resources to an instance which includes the setting, headtags, style variables, scripts, css, contents, views and models. Before using this function, make sure that the exported file from the installer has been pushed to a github repository as this function is referencing the files in the github repository.
Note: This function resets the instance and wipes all the existing resources from the instance before proceeding to the installation process. Make sure to use an instance that will be updated or a newly created instance.
Steps on how to install an Instance template:
- Access the templating.api.zesty.io
- Input your session or developer token in the Token field.
- Select Install Template and input the required fields for installation.
- Instance ZUID (required) - The target instance zuid that you want the template to be installed.
- Github URL (required) - The template files repository that will be installed on the instance. This must contain the resources from the exported instance.
- Branch (default: main) - The target branch from the github repository. By default, the installer will use the main branch but you can specify other branches.
- Github Access Token (optional) - This will only be used if the repository is private. You must provide the access token from the repository.
- Click Install to start the installation process, this will take a few minutes but may vary depending on the size of the resources being installed.
Installing a Module
This function is used to import the resources to an instance from the exported files from the installer. Before using this function, make sure that the exported file from the installer has been pushed to a github repository as this function is referencing the files in the github repository.
Note: This function will return an error once the model name that will be installed already exists on the target instance.
Steps on how to install an Instance module:
- Access the templating.api.zesty.io
- Input your session or developer token in the token field.
- Select Install Module and input the required fields for installation.
- Instance ZUID (required) - The target instance zuid that you want the template to be installed.
- Github URL (required) - The template files repository that will be installed on the instance. This must contain the resources from the exported instance.
- Branch (required / default: main) - The target branch from the github repository. By default, the installer will use the main branch but you can specify other branches.
- Github Access Token (optional) - This will only be used if the repository is private. You must provide the access token from the repository.
- Force Install (default: false) - If set to true, installation will add prefix for the models that already exist during installation. For example, if the model already exists on the instance, this will be installed as about_1.
- Click Install to start the installation process. This will take a few minutes but may vary depending on the size of the resources being installed.
Note: Check the target Instance and verify if the module or template has been installed correctly (eg. contents, models, view/code files, media).
Updated 5 months ago